Creating Striped Backgrounds with Border Stamps
4,696 views · Published 29 September 2014 · 13:21 · Indexed 23 September 2026
Channel: Melanie Muenchinger · 2014 · Howto & Style
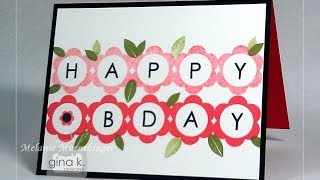
Today I will show you a simple way to fill your backgrounds with the curved and straight borders from Fabulous Frame Fillers, whether you are creating your own patterned papers, single layer card bases or adding to the Fabulous Frame stamp. This is a very festive card that is easily mass produced for the holidays with no or very little layering, requiring minimal cardstock and no extra postage!  We’ll do some stamping off to create the two colors of stripes and a little masking.  This design can be adapted to other holidays by switching up the border, belly band fillers and colors.

Purchase Fabulous Frame here: http://www.shop.ginakdesigns.com/product.sc?productId=2190

Purchase Fabulous Frame Fillers here: http://www.shop.ginakdesigns.com/product.sc?productId=2246&categoryId=16

Supplies: Gina K, Designs Fabulous Frame and Fabulous Frame Fillers stamp sets
Gina K. Pure Luxury White or Ivory cardstock
Gina K. Cherry Red and Dark Chocolate ink pads
Spectrum Noir markers: DR3, DR7, DG3, BG3, GB8
Copic alternatives: R29, R59, YG95, YG99, Y28, W-3
Scissors for trimming frame, sticky notes for masking

Optional: Gina K. gold cording, adhesive pearls, punch for tag, Cherry Red or Cranberry Tart cardstock for base

Apologies, I realized after I finished the video that I forgot to add the shadow to the flower with the BG3 marker!  Refer to card photo and trace underside the flower and leaves.
More from this channel
-
 7:34
Tips for Stamping Letters: Lots of Letters 2
7:34
Tips for Stamping Letters: Lots of Letters 2
-
 9:32
Stamping Simple Stitched Vines
9:32
Stamping Simple Stitched Vines
-
 13:01
How to: Bottled Daisy Coloring Tutorial
13:01
How to: Bottled Daisy Coloring Tutorial
-
 9:41
How to Stamp Stylish Two and Three Step Poinsettias
9:41
How to Stamp Stylish Two and Three Step Poinsettias
-
 15:37
How to Stamp Doors and Wreaths with Holiday Frame Fillers
15:37
How to Stamp Doors and Wreaths with Holiday Frame Fillers
-
 10:12
Black Magic Technique with Festive Frame
10:12
Black Magic Technique with Festive Frame
-
 17:03
Vintage Seed Packet Calendar Using Stately Flowers 10 and 12
17:03
Vintage Seed Packet Calendar Using Stately Flowers 10 and 12
-
 13:37
Shake, Tap, Drop! Sponged Gold Technique
13:37
Shake, Tap, Drop! Sponged Gold Technique