Congratulations Baby Card
268 views · Published 19 April 2017 · 7:34 · Indexed 2 October 2026
Channel: SugarShine Designs · 2017 · Howto & Style
Find me here:
http://SugarShineDesigns.blogspot.com
https://www.facebook.com/SugarShineDesigns/
https://www.instagram.com/sugarshinedesigns/
https://www.pinterest.com/jaxtman01/sugarshine-designs-paper-crafting-projects/

CottageCutz Order Site and Blog:
http://www.scrappingcottage.com/
http://scrappingcottage.blogspot.com/

Links to die cuts used in this card:

Baby Monkey  w/ Balloons
http://www.scrappingcottage.com/cottagecutzbabymonkeywballoons.aspx

Oval Doily & Frame
http://www.scrappingcottage.com/cottagecutzovaldoilyandframe4x6.aspx

Stitched Oval Set
http://www.scrappingcottage.com/cottagecutzstitchedovalsetbasics.aspx

Clouds & Sun
http://www.scrappingcottage.com/cottagecutzcloudsandsun.aspx

Congratulations Phrase
http://www.scrappingcottage.com/cottagecutzexpressionscongratulations.aspx

CARD DIMENSIONS:

Interior:
Base Card: 6 x 6 folded at top, bottom corners rounded
Golden Brown Mat: 5.5 x 5.5
Vellum Mat: 5 x 5, cut oval using stitched oval die sized 4.25 x 3.25
Emboss velum with cuttlebug embossing folder, Oxford
Vellum Rectangle for phrase mounting: 1.25 x 6
Die cut doily from Oval Doily and Frame set, use only the doily and not the frame
Die cut three clouds and the sun from the Clouds & Sun die set
Die cut monkey and balloons from Baby Monkey w/ Balloons die set
Die cut Congratulations phrase with die

Exterior:
Cut three nested ovals the size of your choice for interior of card
Cut the middle oval out of velum and emboss
Stamp your interior message on the top oval
Interior mat: 5.5 x 5.5

Shade all pieces with chalk and/or inks and assemble as shown in the video.
More from this channel
-
 10:11
Love Bird Valentine
10:11
Love Bird Valentine
-
 6:32
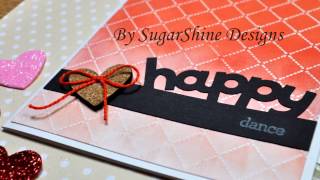
Happy Cards with Cricut Explore
6:32
Happy Cards with Cricut Explore
-
 16:39
Twist Pop-Up Card Base Tutorial
16:39
Twist Pop-Up Card Base Tutorial
-
 6:52
Spider & Ghost Halloween Card
6:52
Spider & Ghost Halloween Card
-
 10:35
Hop Project - Country Bird Christmas Shaker Card
10:35
Hop Project - Country Bird Christmas Shaker Card
-
 7:21
Quick & Easy Christmas Card Series - #3
7:21
Quick & Easy Christmas Card Series - #3
-
 12:33
Winter Loaded Envelope with CottageCutz Dies
12:33
Winter Loaded Envelope with CottageCutz Dies
-
 5:13
CottageCutz Valentine Hop Announcement!
5:13
CottageCutz Valentine Hop Announcement!