Traveling Ring Pour Transitions To A Sweeping Solution, Fluid Acrylics #3284-8.14.18
1,636 views · Published 22 August 2018 · 20:00 · Indexed 27 September 2026
Channel: Expressionist Fluid Art Studio Priscilla Batzell · 2018 · Howto & Style
Artwork purchases support the creation of videos, please contact me at [email protected] for more information. For the best results please include the date and file reference number found at the end of every video title. My website is shared (top left corner) in the last 20 seconds of the video.

To Receive Notifications, turn on notifications on your settings & click the bell near subscribe.

If you enjoy my art, the processes, or my efforts in general, your thumbs up are immensely appreciated!

To shop materials without any additional cost to you available visit:
   https://www.amazon.com/shop/expressionistartstudiogallerypriscillabatzell?ref=ac_inf_tbvh

Please assist me to continue making video tutorials and buy supplies by contributing here:
   https://www.paypal.com/cgi-bin/webscr?cmd=_s-xclick&hosted_button_id=3NFL85WZ3M5VG

To donate to help the studio/be a Patron go here:
   https://www.patreon.com/EAStudioGallery
This helps make my studio usable for an indoor working/teaching/gallery space.

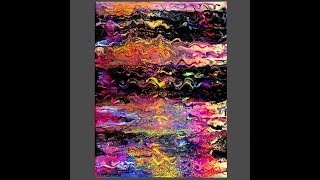
I am using a 16"x20" stretched canvas. All the paints I use are acrylic paints mixed with additives to help them flow more easily. All my colors are stored and mixed in squeeze bottles for ease of use. I spread a layer of white paint using a silicone spatula. This layer helps the colors I add next flow more easily. I have leftover paint to use up and I add new color choices to a small cream pourer added into the layers from the previous "ring pour". I pour out ribbons of striped colors to the canvas in a looping traveling ring pour pattern. I tilt the canvas, flowing the paint, creating patterns and allowing the colors to fill the canvas in a wide striped pattern. I need more paint so I add more to the pour container and continue with the traveling ring pour ribbons. I hold back the flow of paint from escaping the edge of the canvas with an "edge catcher" (a flexible but somewhat rigid transparent sheet of plastic salvaged from packaging). The edge catcher holds the pooled paint and is rocked gently to cover the canvas' side. The paint that is pooled is first squeezed at the edge and then sent back, changing the pattern. I do not really l care for what I see, so I boldly tilt the canvas in the extreme so that all the paint to slides down (and off) and that I do actually prefer. I use a small silicone spatula to manipulate drag and swipe the paint and help cover my edges too. A propane torch is cautiously passed over the surface of the canvas to release any air in the paint that might result in bubbles forming while the artwork dries or leaving pockmarks if left to pop on their own. Warming the paint will also often encourage patterns to emerge because the paint in combination with the Floetrol used in my pouring mix encourages cells to form.

My "pouring" mixture or "recipe" is simple and starts with 2 parts (estimated) GAC800 from Golden added into any acrylic paint color 8 parts (amounts are always estimated). This starts the mixing process. Mix the paint and GAC thoroughly. Next, I add my mixed Floetrol and (half) DecoArt pouring medium. (Shake it first every time!) The truth is, lately, that's my go-to. I add the same (or more) ounces as the first two ingredients and mix everything thoroughly. The consistency is usually medium "body" weight, but other weights are usable with minor adjustments.

To mix, if you use squeeze bottles as I do, add a glass marble and shake your paints every time before you use them. All my acrylic paints are mixed in advance and contained and stored in squeeze bottles. If you are not using squeeze bottles, I suggest using a container that has a lid. I have often used the 4oz size plastic deli containers, and the paint keeps for a long time in them, but you still will have to stir before using the mix again because the Floetrol and other flow agents will rise to the top between uses.  None of my acrylic paint has any added silicone. To create the pearlescent effects seen in most of my artworks, I use Golden's Iridescent pearl "Fine" added to colors. By "eye" until I am pleased with what I see.

Every day I learn new things. I will never stop experimenting, and I am happy to share what I discover with you.

To see finished wet and dry versions of all my YouTube demonstration artworks for sale, visit my Expressionist Art Studio Gallery Fans and Collectors group on Facebook.
#3266 wet, shown in this video.

Find My  Pinterest Boards:
   https://www.pinterest.com/PriscillaiSky/

Find me on Instagram:
   https://www.instagram.com/expressionistartstudio/

 Find me on Twitter:
   https://twitter.com/expresionistart
More from this channel
-
 20:01
#2559 Mountain Sunset Swipe Fluid Acrylics Pouring Part 1-4.19.18
20:01
#2559 Mountain Sunset Swipe Fluid Acrylics Pouring Part 1-4.19.18
-
 12:43
#2651 Fantastic Tribute Rainbow Swipe Fluid Art 4.29.18
12:43
#2651 Fantastic Tribute Rainbow Swipe Fluid Art 4.29.18
-
 18:36
#2708 Part 2, Third Time’s A Charm, A Do-Over Fluid Acrylics-5.3.18
18:36
#2708 Part 2, Third Time’s A Charm, A Do-Over Fluid Acrylics-5.3.18
-
 19:07
#2873 Double Swiped, Blown Skewered & Rain X'ed Fluid Acrylics Pouring 5.30.18
19:07
#2873 Double Swiped, Blown Skewered & Rain X'ed Fluid Acrylics Pouring 5.30.18
-
 13:43
Dumped, Tilted, Pooled, Dumped Back Again, Pushed & Skewered, Fluid Acrylics Pouring #3013- 06.26.18
13:43
Dumped, Tilted, Pooled, Dumped Back Again, Pushed & Skewered, Fluid Acrylics Pouring #3013- 06.26.18
-
 20:00
#2901 Part 1-Swiped Garden Pouring Experiment Indoors, Fluid Art 6.4.18
20:00
#2901 Part 1-Swiped Garden Pouring Experiment Indoors, Fluid Art 6.4.18
-
 10:50
#3117 Awesome Abstract, Toy Shovel SCOOP Applied, Fluid Acrylics Part 2 -7.15.18
10:50
#3117 Awesome Abstract, Toy Shovel SCOOP Applied, Fluid Acrylics Part 2 -7.15.18
-
 19:42
Super-Cute Little Waves, Fluid Acrylics Pouring #3178-7.24.18
19:42
Super-Cute Little Waves, Fluid Acrylics Pouring #3178-7.24.18