Video #83 How to make chocolate designs @home - part 6
4,044 views · Published 4 August 2018 · 4:41 · Indexed 6 November 2026
Channel: momshomemade School of Patisserie & Culinary Arts · 2018 · People & Blogs
How to make chocolate designs @home - part 6
Click on 'Show More' below to see full recipe

Ingredients
White chocolate & milk chocolate
Yellow candy color


You will also need a chocolate mold, butter paper cone and a brush


Steps

1. Temper the white chocolate. Divide in two parts.
2. Pour two table spoons in a butter paper cone
3. Make zigzag designs on mold using paper cone
4. Add candy color in white chocolate and mix thoroughly
5. Again make designs on mold with a brush and colored chocolate
6. Keep the mold in refrigerator for 10 minutes.
7. Temper the milk chocolate.
8. Take out mold from refrigerator.
9. Pour tempered chocolate in the mold cavities.
10. Strike the mold against the surface to remove air bubbles.
11. Keep in refrigerator for 15-20 minutes.
12. Take out the mold from refrigerator.
13. Reverse the mold and strike against surface. Chocolates will come out easily.

The chocolates are ready now.
Enjoy your creation.

See more chocolate videos on  my channel by clicking below link

https://www.youtube.com/watch?v=7ELkqLiw_iU&list=PL3eS6q7XJLajpL9bJZ6nKNrqNMZ7hd4B0

============================
Music in this video :

colourful spots
hooksounds.com

My website : www.momshomemade.in
My FB page: https://www.facebook.com/Momshomemadecakesandchocolates/
Tumblr: https://momshomemadein.tumblr.com/
YouTube: https://www.youtube.com/c/momshomemade
Instaggram: https://www.instagram.com/momshomemade.in
More from this channel
-
 4:54
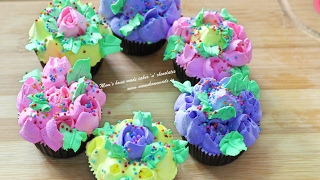
How to decorate cup cakes with Russian nozzles
-
 4:39
How to make Gajar ka halwa (carrot sweet) - Easy receipe
-
 4:21
How to make colourful & healthy maynnoise salad - Easy Recipe
-
 5:53
How to decorate a Black Forest Cake - Easy Recipe
-
 4:53
How to make French Macaroons - Easy Recipe
-
 5:10
How to make ferrero rocher chocolates @home -Very Easy Recipe
-
 4:41
How to make Potato filled Golgappas @home - Very Easy Recipe
-
 5:31
How to make an egg less chocolate cake @home - easy recipe