Steampunk Art Journal Cover Tutorial
552 views · Published 20 February 2016 · 41:01 · Indexed 4 October 2026
Channel: Crafting For Almost Everyone · 2016 · Howto & Style
I used a Reader's Digest Condensed Book  that I removed several of the pages and gesso'd the rest for my art journal.

On the front cover, I used a Ranger Dylusions stencil called small keyholes.  I put Martha Stewart's Stucco Effects mixed with Archival Black Ink on the stencil.  On the back cover, I did the same with the Tim Holtz Clockwork stencil.  On the bottom, I ran another Tim Holtz stencil of a ruler and used the same Martha Stewart Stucco Effects on it. I colored this with silver metallic rub on.  I have several industrial style stamps that I had in my stash and one of them I used with Ranger embossing ink in the center of the back and heated it.  I used black paper quilling strips to make the ruler stand out as well as the side of the keyhole.   I found a cardboard key in my stash so I used a metallic embossing powder and heated it to make it look like it was a metal key.  I kept adding more and more of the embossing powder to make it really thick and then pressed a stamp into the molten to make it look like it had a design in the key.  Sparkle and Sprinkle mixed media  embossing powder is what I used for this. I used metallic rub ons to really color the clock and backgrounds, primarily the bronze and silver colors.  I stamped a couple more industrial stamps on the back and tried to heat emboss them, but the embossing powder wanted to stick to the metallic rub on, so I wiped it back off.  I used the silver rub on for the keyholes so they would show up and then used Gray Archival ink on the keyholes to make them more defined.  I used Dusty Durango ink from Stampin' Up on the background of the right side of the front cover.  I had a cardboard piece that I stamped "Imagine" into and then rubbed Hickory Smoke from Distress ink onto the cardboard to make it darker gray.  I used two black brads from Michaels to attach the piece to the front cover.  I had some black stickers that I had in my stash and I attached them to the binding of the book.  I attached the key on an angle on the front cover.
  On the top right hand of the front cover, I used a stamp of gears and heat embossed it.  Below it, I put down three metal buttons. I stamped with Ranger Archival, a postage style stamp
More from this channel
-
 11:45
Totally Terrific Tags and Trimmings, #1 in a Series
11:45
Totally Terrific Tags and Trimmings, #1 in a Series
-
 32:02
Minion, Wizard of Oz Desk Memo Holder, Easy to Make, Great Gift Idea!
32:02
Minion, Wizard of Oz Desk Memo Holder, Easy to Make, Great Gift Idea!
-
 35:20
Making Gift Bags w/ Embossing, Texture Paste, Chalks & Gelatos
35:20
Making Gift Bags w/ Embossing, Texture Paste, Chalks & Gelatos
-
 21:04
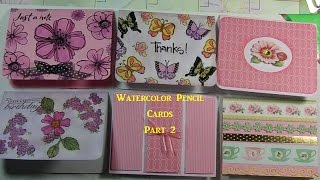
Pt. 2 Card Tutorial, Watercolor Pencils, + Recap & Blender Pen Refill Recipe
21:04
Pt. 2 Card Tutorial, Watercolor Pencils, + Recap & Blender Pen Refill Recipe
-
 15:11
Pretty Birthday Card with Four Step Stamping, Misti & Caulk Embellishment
15:11
Pretty Birthday Card with Four Step Stamping, Misti & Caulk Embellishment
-
 20:51
Great Everyday Sealife or Aquarium Fish Card with Water!
20:51
Great Everyday Sealife or Aquarium Fish Card with Water!
-
 13:29
NY City Skyline Dream Snow Globe Shaker Card
13:29
NY City Skyline Dream Snow Globe Shaker Card
-
 30:20
Let's Talk About Acrylic Blocks - Which are Best for You?
30:20
Let's Talk About Acrylic Blocks - Which are Best for You?