CRUSH your back, legs and calves by combining suspension training with free weights
1,233 views · Published 14 August 2014 · 10:13 · Indexed 8 November 2026
Channel: Nick Nilsson - the Mad Scientist of Muscle · 2014 · Sports
Suspension Training is in a class of it's own when it comes to training. It's generally associated with bodyweight training, using equipment such as a TRX or Jungle Gym.

What I've done here is take the concept of suspension training and pair it with free weight training...and in doing so, made some improvements to a few major exercises.

First, the setup...you'll obviously need some form of suspension training apparatus for this.

Personally, I use Blast Straps from EliteFTS. They're built ROCK SOLID and are designed to hold extremely heavy loads (each strap is rates to 600+ lbs).

You'll need also need a dip belt...the kind that you normally would use to hang weight off your waist for a dip or chin-up.

Secure the suspension trainer to a solid object...and I do mean SOLID. Now attach the dip belt to the end of the suspension trainer using a carabiner (clip).

Now all you need is a barbell or a set of dumbbells...either option will work.


Exercise #1 - Rows

First, secure the suspension trainer attachment up high (about face height) then step inside the dip belt.

Move the belt up to your upper abdomen then reach down and grip the barbell, just as you would for a regular barbell row. Set your feet back so your body is at a 45 degree angle.

In concept, this is similar to a chest-supported row by removing the temptation to hitch the upper body up to get the bar moving...but since the support is coming from the suspension trainer, it puts a very different stress on the body. It's going to force your CORE to engage very strongly in order to not get compressed by the belt.

Row up as you normally would.

You can very easily adjust the angle of your body by moving your feet a little further back.

And yeah, as you can see, THIS is why you want something solid to anchor your suspension trainer around.


Exercise #2 - Hack Squats

The standard barbell hack squat is an old-school leg exercise that, personally, I just never really liked. I could never find a good groove that properly targeted my quads the way it was supposed to.

THIS version with the suspension trainer really solves the problem, though.

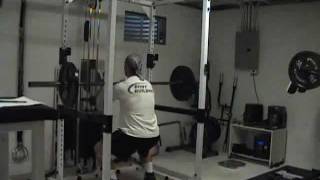
For this setup, the suspension trainer should be anchored low...about thigh height. Step inside the dip belt with the belt on your lower back this time.

Roll the bar underneath your body and sit down, gripping the bar with an overhand grip.

Now stand up.

The suspension trainer allows you to sit back into the exercise, which I find takes the stress off the lower back and puts it firmly on the QUADS, exactly where you want it...and even more specifically on the LOWER aspect of the quads (you can't truly isolate that area...just shift some tension there, like this exercise does).

Come up to a full standing position, then come back down.

To REALLY push the envelope on this exercise, you can also increase the range of motion by adding a Step platform to the mix.

This allows you to perform a VERY deep squat (ATG), with maximum tension on the lower quads...even if your current mobility won't allow you to do this with a bar on your back (ESPECIALLY if your current mobility won't allow you to do this with a bar on your back).

Is it a perfect squat position with the lower back arched? Nope. But here's the thing...because the dip belt is putting pressure on and basically supporting the lower back all the way up and down, I found it actually didn't negatively impact my lower back at all.

That being said, I would still recommend TRYING to keep an arch in the lower back as a precautionary measure...just don't freak out if you're not able to maintain a perfect arch because of the suspension and belt setup.

I would also recommend some grip assistance for this exercise as you start getting into heavier weights, especially if you find that your grip starts to limit the amount of weight and/or the number of reps you can get with the exercise.


Exercise #3 - Standing Calf Raises

Using the same high-anchor, forward-facing setup as you used for the barbell row, and the heavier bar like you used for the hack squat, it's now time for some calf raises.

The concept is simple...pick up the bar then lean forward. As you can see in the first pic, I've got a good stretch on the calves at the bottom.

Then just do a calf raise, pushing yourself forward and up.

This exercise is VERY functional in terms of athletics and the action of the calves.

If you think about it, there are very few sports (I can't think of any) that have you standing on a raise surface with your heels below that surface (i.e. a calf raise).

However, just about EVERY sport that involves forward movement DOES require the calves to contract in a stretched position while you're leaning forward.

This suspended "leaning-forward" position better mimics the position your calves will actually be required to perform in in terms of movement. You're using the calves to move the bar forward.
More from this channel
-
 2:25
Squat Giant Set For A Complete Lower Body Workout
-
 0:12
Band-Machine Leg Presses - Adjust to Strength Curves
-
 0:56
Stiff-Legged Deadlift Negatives for Hamstrings
-
 2:29
Tricep Training - Inset Superset done Rest-Pause
-
 1:56
Suitcase Style One Arm Deadlifts With Bar Grip
-
 1:48
Forearm Dumbell Preacher Curls - Kill Your Grip!
-
 0:19
Reverse Alternating Shoulder Press
-
 1:21
One Side Loaded Barbell Squats For Core